Restorations – Where/How/Cost

To Restore, or not to Restore…That is the Question! By Reyne Haines

September 11th, 2012 by

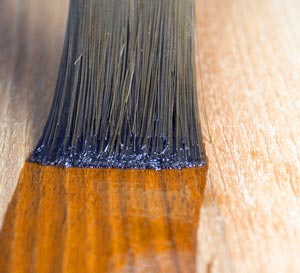
varnish-brushOver the years, antiques have been passed down from generation to generation, from one antique shop to the next, and from flea markets all over the world to your home.  With the volume of households antiques have been in over the last 50-100 years, is it any wonder any of it is still in mint condition?

In the United States, collectors often want their antiques to be flawless. In other countries, some damage is more accepted.

I am often asked, “If I buy an item that is restored, does that make the value increase?”  That’s a loaded question.  It doesn’t make the item worth the same as if it was still in “original” mint condition.  However, it can certainly increase the interest in a potential buyer.

Should I restore my things?  It all depends on the type of item you are talking about.  To replace missing stones on a piece of jewelry, yes!  Should I refinish an American Highboy, probably not.

What’s a handy item to have when out antiquing? A black-light!  This handy little tool can help you detect if a piece of glass, pottery, porcelain or a painting has been restored.  Take the item and the black-light into a dark room. Turn on the portable light and hold it over the item.  Wave it from side to side and look for any spot to “jump” out at you.  If something seems to stand out, there might be some issues with the piece.

What if you want to buy a piece that needs restoration? Should you buy it, or should you pass?  In many cases, if an item is damaged, you can expect the value to be 10-20% of what it would be worth if pristine.  If an item is rare, that percentage would change.

So if you just happen to love the item, and it is priced accordingly, then by all means, buy it and enjoy it!  However, if your plans call to restore the item, you might contact your local restorer first to determine how much it would cost to repair it.  Restoration is often not cheap, and even though you are getting an item as a cheap price because of damage, the restoration costs might bring the total investment to the same or close to what you would have to pay if the item was in mint, original condition.

With all this said, where do you go to have your antiques restored?  For simple restorations, you can do a search online for “antique restorer (insert your city/state here)” and there should be plenty of restorers in your area.  If you have a bigger project, or an expensive item you want to make sure is restored properly, contact your local museum and speak with the curator in the department that exhibits your type items.

Finally, you can reach out to Old World Restorations at:  www.oldworldrestorations.com

Or Wiebolds: www.wiebold.com

Recognized 20th Century Decorative Arts Expert and Appraiser.  As seen on CBS “The Early Show” and NBC’s “The Art of Collecting”. Haines has written numerous articles and books on collecting. Her most recent pubication is “Collecting Wristwatches” for Krause Publications which comes out April 2010.  Reyne is a frequent appraiser on PBS Antiques Roadshow.

Maybe it’s Time to Restore That Cherished Piece of Fine Furniture

August 23rd, 2012 by

by David J. Currie

President, David J. Currie Upholstery

www.currieupholstery.com

Many of us have a favorite sofa, wingback chair or love seat that we wouldn’t think of parting with, but really needs some repair. Maybe the fabric is worn or the wood finishing has tarnished or the cushioning has gone flat. Or maybe, tucked away in the spare room or attic is a cherished antique or family heirloom that you have always wanted to restore, but didn’t quite know how to go about it.

There is a significant difference between repairing and restoring furniture. With a repair we are achieving functionality of the furniture piece, ensuring that it will now work as originally intended. Replacing broken or squeaky wood members, torn upholstery and flattened or disfigured cushioning would be included here. This can bring on a new life for an otherwise well-worn or even beat-up piece of furniture.

Simple repairs on furniture can sometimes be done at home by someone who is handy with tools, re-gluing a broken chair leg or replacing a screw or bolt. But repairs involving refilling cushioning or replacing upholstery should be left to a professional upholsterer.

With fine furniture and antiques, one may desire to go a bit further, into restoration of the piece. The main goal of restoration is to bring back the original appearance of the furniture, as well as its functionality. Furniture restoration can be as simple as a light cleaning to remove disfiguring dirt or grime, or it may include an almost complete rebuilding or replacement of the piece. Restoration can even extend into conservation of the furniture, which is aimed at preserving the piece against future deterioration.

Restoring furniture properly not only requires extensive technique and an understanding of the history of the item, it is also an art form.

For many people, there is little value in an antique that is unusable or not able to be displayed, but most would still like the item to reflect an aesthetic that shows its age. An over-restored item can actually take away from its originality and perceived value.

Restoration of wooden furniture can involve a number of steps such as paint stripping to reveal the natural wood, sanding to remove knocks and scratches, joint repair and gluing, the reduction or elimination of warping and bowing of individual frame wood pieces and other steps as needed. All wood surfaces should then be sealed with a deep coat of penetrating preservative to protect the old, and usually, dry wood. In the finishing process, it is generally desirable to match the original patina of the wood.

The patina is the natural sheen on wooden furniture produced by age, wear and polishing. Harsh stripping can remove this naturally-aged finish. If the original patina-look is not desired, then a finish which retains the essence of the piece and its time period should be created. Producing an aged finish requires a fair degree of skill, however. The finish also acts to preserve and protect the furniture. When the finishing is done, the piece can now be reassembled or put through whatever reupholstering is needed.

Reupholstering fine furniture and antiques usually involves complete restoration. Beginning with the removal of all of the old fabric and padding right down to the frame, any necessary repairs can now be done and reconstruction can begin. Traditional padding materials and techniques are used to ensure authenticity. This includes the installation of fresh webbing, retying or replacing coil springs, burlap, hair pad, cotton padding, buttons and tufting, channel backs, and adding any new cushioning required to restore the original shape and usable state to the furniture. The right selection and matching of fabrics, leathers and patterns is critical to a properly finished or restored piece.

Each piece of furniture is unique, and should be worked to achieve the finished product desired. When restoring fine furniture, and particularly antiques, it will be found that each piece has its own individual character, history and challenges. Therefore, no two pieces are handled with exactly the same procedures. Techniques will vary somewhat to accommodate the individual needs of each piece of furniture.

The complete restoration of a furniture piece usually results in far better quality than what is commonly available on the market today. Custom upholstering, for example, that provides an unlimited selection of fabric textures, styles and colors to choose from is far superior to any ready-made factory furniture.

Furniture restoration, professionally done, not only ensures that a piece retains or increases its perceived and monetary value after restoration, but more importantly it creates a beautiful and functional piece of furniture that can add character, color and renewed life to a room. And that, many will agree, is the real beauty in restoring a cherished piece of fine furniture.

About David J. Currie Upholstery

David J. Currie Upholstery has been servicing clients in the Western New York area since 1980 and is skilled in all facets of furniture repair, restoration and conservation. It provides expertise to antique and fine furniture owners, including private clients and antiques dealers.

Currie Upholstery services include replacing fabrics and cushioning, polishing and repairs, period and hand-rubbed finishes, touch-up and color matching, chair repair and re-gluing, French polishing, reconditioning existing finishes, gilding and frame repair, faux finishes, hardware and metal polishing, furniture refinishing, stain removal, mold and mildew removal, repairs to chewed furniture, and inlay and carving repair. The shop provides free estimates and in-home consultations, and no-charge pick-up and delivery.

For more information on David J. Currie Upholstery, please contact David Currie; Phone 716-374-3632; 332 South Elmwood Avenue, Buffalo, New York 14201; email currieo@yahoo.com; www.currieupholstery.com.

How to Identify a Solid Silver Object – By Jeffrey Herman, hermansilver.com

September 16th, 2011 by

Copyright Jeffrey Herman, hermansilver.com

Normally, if an object is solid silver it will be indicated on the piece. Examples are: Sterling, 925, 925/1000, 900, Coin, Standard, 9584 (English Britannia), 800 (Germany), 84 (Russia), etc.). Most American-made objects are marked on the bottoms of holloware and on the reverse on flatware. Foreign-made objects can be marked most anywhere, and are sometimes accompanied by additional marks applied in the country’s assay office which tests the quality of the precious metal during its manufacture. Rarely will you find a piece made of solid silver that isn’t stamped. If an object isn’t stamped, a non-invasive identification method is judging by tarnish color. Silverplate will exhibit a blue-purple hue, where solid silver will exhibit grey-black. If you cannot determine if an object is solid silver, consult a silversmith or jeweler who may use an acid test.

Jeffrey Herman started Herman Silver Restoration & Conservation in 1984, and has built a national reputation of quality craftsmanship and sensitivity towards the finishing of every piece. Herman has repaired & reconstructed everything from historically important tankards, tea services, and tureens to disposal-damaged flatware. And yes, he will also polish a single spoon or fork. He considers himself an environmentalist, using the safest, non-toxic, most organic products whenever possible.


Herman Silver Restoration & Conservation

PO Box 786

West Warwick, RI 02893

800/339-0417, 401/461-6840

Fax: 401/461-6841

E-mail: jeff@hermansilver.com

Web: http://www.hermansilver.com


Educating the Guardians of our History – By Jeffrey Herman

September 15th, 2011 by

Copyright Jeffrey Herman, hermansilver.com

I find it’s time to discuss a very troubling trend I’ve witnessed in silver displayed in museums: over cleaning. Years ago, I visited a prominent northeastern museum housing a large and impressive silver collection. Major presentation and historically important American and European silver were on exhibit. I was on a museum tour at the time, explaining to the other silver aficionados in the group how some of the pieces were created. I became alarmed at what I had been viewing: silver objects stripped of every last bit of patina!  I soon asked the docent why the silver had been stripped, leaving it so white, so one-dimensional. She replied: “The museum wanted to display the silver the way it looked upon completion by the silversmith.” I pointed out the obvious purple-colored firestain that mottled many of the objects, and that it would not have left the silversmith’s workshop in that condition. That the smith would have “fired” their piece, then given it an acid bath to dissolve the copper from the surface of the sterling, leaving a fine silver finish. Over decades of polishing, the oxidized copper (or firestain) may be revealed.  Silversmiths, especially those practicing up through the 19th century and into the 20th, probably would have patinated an ornamental piece, giving it a more three-dimensional look. “That’s just the museum’s policy,” the docent said. I had the immediately urge to confront the museum director and curator of decorative arts, but that wasn’t the time.

Modern “taste,” fickle at best, has no place in museum conservation. And, I am not alone in thinking that museums over clean their silver. Recently, a spoon collectors club visited my workshop. Below is an excerpt from an e-mail I received from one of the collectors after the visit: “I am always distressed to see museum silver with all the patina carefully removed. New sterling is now even being sold looking as though it just had a bath in Tarn-X.” 

Much time had passed from that eye-opening day at the museum visit to receiving that letter. It is a reminder of my responsibility to silversmiths long passed, to collectors unknowing of possible impending alterations to their bequests, and to museum decision makers entrusted with preserving our history. Museums are considered the authority of how our objects maintained. If ground-breaking or ill-conceived ideas are made without consulting others in the field (and that includes silversmiths themselves), irreversible mistakes will continue to be made without the public’s knowledge. And if we consider a museum’s policy to be the last word, we will then accept those poor conservation techniques as our own.

Jeffrey Herman started Herman Silver Restoration & Conservation in 1984, and has built a national reputation of quality craftsmanship and sensitivity towards the finishing of every piece. Herman has repaired & reconstructed everything from historically important tankards, tea services, and tureens to disposal-damaged flatware. And yes, he will also polish a single spoon or fork. He considers himself an environmentalist, using the safest, non-toxic, most organic products whenever possible.

Herman Silver Restoration & Conservation

PO Box 786

West Warwick, RI 02893

800/339-0417, 401/461-6840

Fax: 401/461-6841

E-mail: jeff@hermansilver.com

Web: http://www.hermansilver.com

CARE, CLEANING and CONSERVATION METHODS for ANTIQUE METAL WARE: Useful tips in restoring Antique Lamps, Clocks, Ormolu, Spelter, Bronze etc

February 11th, 2011 by

Contributed by www.Marks4Antiques.com – a membership-based service specializing in providing identification & appraisal advice on antiques & collectibles.

NOTE 1: Any form of cleaning or restoration of antique metal objects may necessitate the use of various chemicals, many of which are poisonous. Even if by themselves they are not, sometimes combinations of them can produce fumes that are harmful and occasionally lethal. Therefore, it cannot be emphasized too strongly that no cleaning should take place in a confined area or in close proximity to food. All of the methods described below should be performed very carefully and with every safeguard that can be made available.

NOTE 2: Not all antique Metalware items should be cleaned and no general diagnosis can be applied. Each individual object must be subjected to individual attention. Obviously what is suitable for a pair of antique brass candlesticks of the 19th century, for example, is not applicable to a considerably earlier object such as a Sheffield silverplated tray. Also, the use to which an item will be put is an important consideration; for example, is your Georgian antique Coffee or Tea Set or your pair of collectible candlesticks going to be used or are they purely for display or to be kept as cabinet pieces? If used for food or drink still more difficulties will arise. All items should be handled with extreme care until you have discovered your own abilities and the techniques that you can manage. In early stages of experimentation in cleaning and polishing you should practice on articles of no great value and, broadly speaking, the more antique an item is the less you should clean it or even handle it.

The information in this article is of a general nature: if you have a piece of antique metalwork that you value a great deal or that is of such merit that it needs extra careful handling, the advice of a museum or of a specialist expert should be sought. There are so many different blends of base metals used on antique metal ware that the cleaning methods applicable to some will do more harm than good to others. There are also certain individual pieces of metalwork, which, because of their very nature, require specialist treatment. At all times it should be aware that in cleaning an antique metal ware item, your aim should be to clean and restore an object as near as possible to its original condition.

There are, however some exceptions to this rule: one is the case of an object of some age which has acquired a permanent and pleasing patina, an antique or collectible Lamp, for example, or a medieval candlestick or bowl, which has become dark green, brown or black with age. If there is no deterioration of the metal, then this patination should under no circumstances be disturbed. A sparing application of a good quality transparent wax polish carefully removed with a silk cloth should not do any damage to a patinated object and will improve the surface.

Another example of an antique which does not benefit from the attempt to restore it to its original state is a piece of old Sheffield plate which shows signs of wear. The color of the metal showing through the silver – this is known technically as ‘bleeding’ – is to some collectors a point in its character. In any case, replating by modern electroplating will never give back the original color. The charm of antique Sheffield plate lies in the mellow color of the old silver, nowhere near as white as modern electroplating. In its own lifetime, if there were a fault or if, through heavy usage, Sheffield plate had to be repaired, this was done by French Plating. This method of restoring antique Sheffield plate uses a very fine silver foil that was laid over the worn part and made to adhere by a little gentle heat or by burnishing. French Plating is rarely used by craftsmen nowadays. Only when a piece of antique Sheffield plate has completely lost all its original plating and is reduced to an entirely copper appearance is it perhaps permissible to electroplate and then merely in order to restore it to something like its original state, especially if it were used for food.

In general, the first step in the care and conservation of an antique piece of metalwork is the removal as far as possible of whatever is causing deterioration, such as rust in the case of iron and steel, then thorough cleaning and polishing followed finally by the application of waxes or lacquers to help to delay decay.

It is impossible to arrest decay on antiques completely: all one can do is to delay it for as long as possible. As in any other form of antique a moderate even temperature is required, and it is necessary to avoid extreme cold or damp. These are in effect the main essentials of what is known in an antiques museum as ‘conservation’. What techniques and practices you use and how you tackle the work depends largely on whether the metal is brass, steel or pewter and of course the composition of the actual item.

Antique Iron and Steel

With antique iron or steel objects, which are frequently found in a rusty state, the first step must be to remove this rust. Any that is loose may be removed with a wire brush and then, if the object is fairly small, boiling in caustic soda will remove a great deal of what remains. CAUTION: Do not let this mixture come in contact with your hands or your eyes. If an accident should occur, wash any skin surface that has been exposed lots and lots of clean fresh water.

For a larger object it is necessary to soften the remaining rust by soaking the item for several hours in paraffin oil or in one of the commercial derusting oils. However, most chemical derusters tend to leave a dull matt-grey surface, which the original antique piece rarely had. They are excellent, however, for treating antiques which are going to be painted a dull black such as wrought iron lamps or railings.

Another general method is to use a fine grade of emery cloth and oil. The emery cloth may be wrapped round a shaped stick for getting into the various contours of a pattern. The oil will help to prevent too many scratches. If you use emery paper dry you will get a very scratched surface indeed. Use the mildest emery that will do the job, and when you think you are near to finishing, cut it to a yet finer one. Coarse emery should not be used except in very bad circumstances. Never clean too heavily upon a raised surface as you will tend to blunt the pattern.

Having cleaned the item to the degree you want, wash with methylated spirits, dry with clean cloth and place it, wrapped in a piece of newspaper, in some form of heated cupboard (an airing cupboard is ideal) and leave it there for two to three days to drive out any damp that may be in the metal. If you are not going to put it to practical use, at this stage seal with lacquer or wipe over with an oily rag. Some antiques collectors wax polish their ironwork: if your house is very dry this is quite a good finish. The great enemy of iron and steel is of course damp, and this will cause rust very rapidly. As in almost every other form of antique metalwork, a dry atmosphere is the most beneficial. If the atmosphere is damp and there are chemical impurities or salt in the air, you should periodically wipe the piece over with a slightly oily rag. From time to time, inspect antique iron or steel specimens for signs of rust.

Antique Wrought Ironwork

Some specimens of antique wrought ironwork may be rather large, as for example gates or window grills. Remove as much loose rust as possible with a wire brush, clean off with emery paper, seal with a derusting fluid and finally paint with a dull black paint. For a really fine piece of antique wrought iron, the treatment should be left to an expert.

Antique Cast Iron

In the case of antique cast iron objects, usually of the 19th century and which are now very collectible, there are two treatments. They can be either cleaned of all loose rust, dried and painted black, a very good treatment for any form of antique iron item, or they can be sand-blasted by a professional. This gives a sort of silvery effect. The object should then be lacquered.

Georgian or Victorian Cut-Steel

The cleaning of an antique piece in cut-steel must be approached with great care, and if possible each little facet should be cleaned separately. Please use extra care and be patient because it is important that the edges of cut-steel do not get dull. This applies to all examples of cut-steel from large objects such as Georgian andirons to small pieces such as a buckle, an antique buttonhook or a collectible corkscrew. The great glory of cut-steel is its many facetted surfaces, and these should be kept as crisp as possible.

Antique Brass and Copper

The age-old method of half a lemon and salt is excellent especially for a flat surface such as an antique tray. Apply, rinse off, dry carefully and clean with an impregnated wadding, polishing finally with a soft cloth. A piece of old silk is ideal; manmade fibers such as nylon tend to scratch the surface. Sometimes with deeply engraved or repousse decorated antiques, extensive cleaning in the past may have clogged the pattern with the remains of old dry polishes. This should be removed with a little methylated spirit and a stiff brush and then cleaned with impregnated wadding as described above. This wadding is less likely to leave traces of cleaning material behind.

Another method for an antique brass article is to wash it in a mild ammonia solution and then to clean with either oxalic acid and salt or vinegar and salt. Following this treatment, it should be washed with water, polished and lastly lacquered.

To save cleaning, and consequently to preserve antique metal ware, a modern technique much used by museums is to lacquer with a cellulose lacquer specially made for brass or copper. This should most certainly be carried out with any early or rare pieces and for pieces with fine crisp edges. The item should first be thoroughly cleaned, either as above and finished off with a succession of cloths until none is soiled, then cleaned with acetone. This should not be done in a confined space or near a flame because this liquid is very volatile. Cotton gloves should be worn to avoid fingerprints which would show under lacquer. Note: rubber gloves should not be worn as some types are destroyed by acetone. When cleaned, the piece should be lacquered with a good cellulose lacquer painted on slowly and liberally with slow easy strokes and avoiding bubbles. Do not worry too much about brushmarks since these usually disappear in the drying. If the piece has been previously varnished or lacquered, this can be removed with paint stripper, following the manufacturer’s directions, then treated as above. If the object is not handled too much, this type of lacquer will last for some years.

Antique Bronze

Antique bronze pieces, either in the form of a figurine or a really antique goblet or lamp, have normally over the years acquired an all-over patination, ranging through many shades of brown to green. If this patination is breaking up and there are spots of a brighter color, as for example bright green, action should immediately be taken to stop this because this efflorescence is the change in the surface of the metal which is known as ‘bronze disease’. It is extremely difficult for the amateur to treat and a museum or a specialist antiques restorer should be consulted at once.

As a temporary measure, if it is quite definitely active and the collector is unable to get professional help quickly, the light powder should be brushed off and the piece kept as dry as possible. To clean a normal bronze, wash it with a very mild soapy solution, dry thoroughly and then apply a little fine wax polish.

Antique Ormolu

Ormolu was frequently used for antique candelabra, antique candlesticks, on handles of andirons, antique desks and other antique furniture and small ornamental pieces in general. The gilt was applied in various ways, but with some forms of inferior ormolu, it was only a thin layer of gold lacquer painted over finely finished and polished brass. This method was frequently used by English craftsmen copying the French. Cleaning should be tackled with great care; gold at best is a very soft metal and harsh cleaning will remove it. As a first step in the cleaning of an ormolu antique piece, choose an inconspicuous area and observe the effect of cleaning on this. Use warm water to which has been added a mild solution of household ammonia and a good quality soap-based washing liquid. If no ill effects can be seen, continue with this cleaning for the complete piece. If a stronger cleaning mixture is needed, add more ammonia. Work in a current of air and wear protective gloves.

To clean ormolu mounts on antique furniture, carefully remove each from the piece of furniture, making a note of its original position. Save the pins, nails or screws that were used to fix it. It is a good idea to make sketches of mounts; the fixing pins can then be stuck through the equivalent holes. This is not just good advice: it can be very necessary as antique mounts were individually made and will not always fit into another position. Once removed, they may be dealt with as described above. If ormolu needs regilding, consult a professional Metal Plating Specialist. Modern gilding by electroplating is rather bright and produces a shade different from that of the old antique ormolu. On the other hand, the old technique of mercury-gilding (fire-gilding) is very expensive and gives off poisonous fumes. Very few craftsmen use this method, but for a superb piece it is worth trying to find a firm specializing in it. Never use a gold paint or lacquer because under no circumstances does this give the right appearance.

Antique Pewter

If you collect this interesting metal, your first and immediate problem is whether to clean your pewter bright or to leave it patinated to a dull natural sheen. Some pewter collectors prefer it in a bright state, whereas others like the quiet soft gray color. In most cases, antique pewter, if in reasonable condition, should be left as far as possible undisturbed.

If the metal has deteriorated through neglect or by being exposed to extremes of heat and cold, and obviously needs attention, it should be conserved with extreme care. Any dent or damage of that nature should be dealt with by an expert.

On the subject of cleaning antique pewter there has been an amazing variety of methods advocated over the centuries. A few of the standard cleaning techniques are based on methods used as early as the 17th century. During the period that pewter was in common use for food and drink, it was kept bright by a very mild abrasive, such as crushed eggshell, fine sand etc., was washed in soapy water, rinsed in clean water and dried. Then, if not being used at once, wiped over with an oily rag. If pewter purchased today is bright and clean and the intention is to keep it that way, clean the piece with impregnated wadding, polish with a clean cloth and olive oil or a similar oil.

If pewter is not kept polished, it gradually dulls down over the years, by a process of oxidation, to a soft gray sheen, much admired by many collectors of antiques. This patination is certainly attractive and to preserve it, the piece should be kept very slightly oiled all over with olive oil. Oil of any description seems to revive antique pewter by penetrating into the metal.

Unfortunately, due to the nature of pewter, its susceptibility to extremes of heat and cold and the consequent corrosion that can develop, this attractive metal is often purchased with bad oxidation or patches of what is known as pewter disease. This must be treated or the piece will be ruined. Great care must be exercised in this treatment both for the metal and also the person handling it, as the materials used are often poisonous or harmful to the skin.

If there is heavy corrosion (or pewter disease) one of the following methods may be of some use.

1. Add one pound of caustic soda slowly to four gallons of cold water, using an iron container. Heat the mixture slowly. Place some hessian or canvas in the bottom of the container and lay the pewter piece on it. Keep the mixture boiling for some hours, examining at intervals. If this shifts the corrosion, remove from the mixture, rinse thoroughly in warm water and clean with a fine abrasive such as crocus powder, rotten-stone or very fine emery powder and paraffin, finishing with powdered chalk or plate-powder. Lastly, oil the piece.

2. Another method, for perhaps a less corroded piece, is to wash in a strong mixture of soap and soda, then cover the whole surface with a watered-down solution of hydrochloric acid applied with a rag on a stick. The strength should be 60% water and 40% hydrochloric acid. (Warning: always add the acid to the water, never the water to the acid.) Leave on for a short while, then rinse off. Reclean with fine emery powder and oil. Wash, first in soapy then in clear water, and polish.

3. Another recipe for cleaning is: 2oz caustic soda, 2 oz lime, 6 oz common salt. Dissolve this in three quarts of warm water. When dissolved, add the mixture to two gallons of cold water. Leave the piece of pewter in this solution to soak and finally clean with fine emery powder and oil.

Also useful as a cleaning agent is oxalic acid, either used neat or watered down. Rub in with fine emery powder, rinse off and polish, then oil.

After using any of these methods of cleaning, a prolonged soaking in paraffin oil for several days will do no harm and should revive the metal.

For general cleaning, if this is necessary, the safest method is to use very fine abrasive powders such as rotten-stone or crocus powder or a very fine emery powder. Put on with an oily rag and work in a circular motion to avoid obvious signs of scratching. Grades of ‘fine’ emery paper, liberally drenched in oil, may be used for cleaning but must be used with care. Always use the finest grades and again rub in a circular motion to try and avoid scratches that show. The piece can be finally cleaned with a little white spirit or methylated spirit, dried and then oiled.

All antique pewter will remain in good condition if kept behind glass. When properly cleaned it can remain in a good display cabinet for at least a year, and this of course is the best way of preserving it. A good display of cleaned antique pewter may be seen in the American Museum in Great Britain. Pewter should never be stored in an oak display case or on oak display racks as this wood contains acid fluid, which reacts against any metal of the pewter-spelter-lead group. An open oak dresser, against which it is often seen, is less dangerous to the metal as the collector would polish both dresser and metal fairly frequently and so prevent corrosion.

Antique Lead and Zinc (Spelter)

The above remarks also apply in the main to lead. Objects in this metal that you may come across are antique tobacco-jars or small lead figurines. Zinc is also known as Spelter. Antique Zinc objects of the 19th century are frequently found and are often in a very dirty and distressed condition. It is possible that a stiff wire brush and a little oil will get these articles up to quite a high degree of polish. Wash the pieces in hot soapy water using a stiff brush; on no account use caustic or any soda. Clean with a wire brush and oil, and polish with an impregnated wadding. Finally clean with acetone or methylated spirits and, if you wish, lacquer. If you prefer not to lacquer them, some 19th-century antique pieces can be cleaned once a week with impregnated wadding without doing much harm.

Antique Tole, Pontypool, Barge Ware and Japanned Tin

Extreme care must be taken to preserve and not destroy the existing paintwork. You might find it useful to try a mixture of one-third white spirits, one-third methylated spirits and one-third linseed oil. This is a good and fairly harmless cleaning agent for antique paintwork. Apply with a cottonwool pad to a small corner of the object and see what results you get. If you are satisfied that you are not attacking the paintwork, clean the whole surface and apply a little good quality wax polish. If the piece is in definite need of paint restoration, try to find a competent professional antiques restorer who will take the job on. The restoration must never alter the feeling of the original piece and the object should not be entirely repainted. As much as possible, the original antique paintwork should be preserved. Do not attempt to paint it yourself unless you are experienced and competent, and then be careful not to overdo the restoration or the spirit of the original will be lost.

A final note: Please use extreme care when cleaning your antique metalwork, both for your own sake and also for that of the metal collection. Please always bear in mind of the varying compositions of the individual metals and the state of decay in which an individual antique item may be found. Never rush into cleaning a piece. Never hesitate to consult a museum or a specialist on any problem that may arise.

Cleaning Your Fine Cut Glass & Crystal

February 9th, 2011 by

Image: McKinley Hill Antiques

Contributed by www.Marks4Antiques.com – a membership-based service specializing in providing identification & appraisal advice on antiques & collectibles.

There is as much difference in the color of glass, meaning only transparent colorless glass or crystal, as there is in the color of diamonds. The beauty and value of antique Glass or Crystal, just like in the case of Precious Stones, are measured very largely by its perfection.

Fine antique glass should be of a purity that practically renders it invisible without any trace of yellow or green cast or opacity. Sometimes it will have a slightly bluish white color. Antique Glassware that otherwise seems clear with respect to its color when seen by itself will often appear at a decided disadvantage when placed beside a really fine piece.

Modern detergents and the use of a good bottle brush will generally suffice for removing the usual discoloration caused by the contents of decanters, cruets, perfume bottles, etc. Where cloudiness or stain persists, many remedies have been suggested and tried with varying degrees of success. Among them:

  • The use of Polident (used for cleaning false teeth)
  • Liquid Plumber (used for clearing clogged drains – highly caustic and requires careful handling)
  • Adding uncooked rice to vinegar and shaking vigorously
  • Using a tea bag with vinegar and letting it soak for 24 hours
  • Allowing chopped potato peel with a small amount of water to stand in a bottle overnight

Oiliness may be removed with alcohol left in for about 15 minutes. In each instance, the item should be thoroughly rinsed and dried afterwards. Strips of cloth may be inserted into bottles to dry them and then removed with a heavy wire or hook.

To obtain the best results, polishing was done in three stages. First, it was done with wooden wheels fed with pumice, stone and water; then brush or wool wheels with the same preparation, and lastly cork or felt wheels with finely compounded putty powder. About the turn of the century, the acid bath, quicker and less expensive came into use for polishing. It was hand-burnishing, however, that gave the superb brilliance down to the smallest detail.

Working the lather into the cuttings with a soft brush, or toothbrush will enhance the brilliance of the deeper and more intricate incisions. The glass should then be dried without draining on a soft towel. When perfectly dry, the cut surfaces should be gone over again with a clean dry brush. A soft, lint free cloth should then be used to give it a high polish.

Antique Glass which continues to cloud up after cleaning and rinsing is known as “sick glass.” It is caused by the formation and separation of crystals due to imperfect fusion of the metal or too high an alkaline content in the making. It can be professionally polished off and then “glass wax” applied if the area can be reached. Frequent applications of the wax will be helpful in delaying further deterioration. Unfortunately, this remedy is usually not practical where it is needed most – in the cleansing of bottle type containers.

The use of ammonia or strongly alkaline soaps on antique Glass or Crystal should be avoided. Extreme and sudden changes of temperature may also be harmful. Before using ice-cream platters, punch bowls, sherbet glasses or other pieces designed for frozen foods or chilled beverages, the glass should be allowed to stand for a few minutes in a cold place or held under a jet of cold water.

Cut glass with sterling silver mountings was once very popular. To this very day, many people consider the use of sterling articles with cut glass as the basis for the most elegant table settings. However, each section must be carefully cleaned using a different ‘set of rules’.  In general, in cases of antiques that are made of a mix of different materials, please be careful so as not to have certain chemicals or cleaning agents suitable for one material come in contact with other parts.

For information and useful advice on cleaning Metal items, including Antique Sterling Silver or Antique Silverplate, please see another article on www.Info4Antiques.org under the “SILVER & JEWELRY” section.

You can also read the article, CARE, CLEANING and CONSERVATION METHODS for ANTIQUE METAL WARE: Useful tips in restoring Antique Lamps, Clocks, Ormolu, Spelter, Bronze etc, right here on the Antiques.com blog!  We’ll be posting this article next so be sure to come back for these useful tips!

Happy Birthday To Us!

February 3rd, 2011 by

Antiques.com turned a year on Feb 1st 2011!  Thanks to all of our vendors for helping us to build our site into one of the best antiques sites on the web!  We’ve had more than 15oo dealers join in the fun so far, and we’re always looking for more.  We’re excited to offer over 80,000 items for sale on Antiques.com, but that number increases every day as more and more vendors sign up to be a part of our growing family.

To all of the people that visit Antiques.com looking for the perfect gift, trying to spruce up their home with a beautiful antique, or simply out of curiosity, thank you for coming!

And for everyone, vendors and antique aficionados alike, we’ve recently added a few features to our home page that we think you’ll enjoy!

– First, check out the Deal Of The Day – Each day we’ll offer a new deal from a vendor that is eager to give you a beautiful antique for a steal!

– Next, feast your eyes on the Cool Antique Of The Week – Each week we’ll show you something interesting from the site that is available to be purchased and fawned over by it’s new owner!

– And finally, have some fun with What Is This Antique? – Each week we’ll choose a new and interesting, if not a bit obscure, antique to feature for this game.  Take a guess, or several guesses, at what you think it is, and then each Monday we’ll publish the list of guesses submitted by everyone, along with the actual name and description of the antique.

Antiques.com strives to offer a wide variety of beautiful and interesting antiques, collectibles, and fine art pieces.  We’re looking forward to another stellar year where we add to our already impressive list of vendors and push our inventory to over 100,000 items!  So Happy Birthday To Us!  We’re looking forward to another fantastic year!

Antique Furniture Restoration Tips

August 18th, 2010 by

You’ve just brought home a piece of antique furniture and underneath a bit of grime or an ugly coat of paint, you recognize an item that may be valuable, or beautiful, or possibly both. What do you do next?

Will a simple cleaning and restoration suffice? Or would you prefer a complete refinish?  How can you decide?

The First Step: A Closer Look.

Examine the piece carefully for clues about its origins. Search every surface for anything that looks like a signature or manufacturer’s label. If the piece isn’t antique it may still be valuable, and we’ve all seen episodes of Antiques Roadshow featuring refinished American masterpieces that should have been allowed to retain their original patina.

If you find a mark that you aren’t able to interpret, take the piece to a local museum curator for an expert opinion before you do anything to the finish.

Next: Cleaning.

Clean the piece thoroughly and gently using water and a bit of oil soap. Cleaning alone may bring a beautiful piece of antique furniture back to life. Add a little glue to the loose joints and replace the brass fixtures and this may be enough to win over a skeptical spouse and help the new-old furniture find welcome in your home.

Stripping the Old Finish Off

If you’ve decided to go forward with a refinish, your best and safest option is have the work done by an antique restoration professional. But if you’re comfortable with the risk and have the tools and a ventilated space in which to work, few DIY projects are as satisfying as this one.

Some Notes About Strippers

Furniture strippers are highly toxic to breathe and should not be allowed to come in contact with skin. Methylene chloride based strippers work the fastest, but are also the most dangerous. Gel strippers are a safer and slower alternative, but neither of these options can really be considered “safe.” Work outdoors if possible, wear gloves, and dispose of any rags or stripper-soaked items outside since they’re highly flammable and can spontaneously combust. Always read and adhere to package directions.

Furniture strippers develop a waxy skin when exposed to air. This keeps the product from evaporating before it can sink into the wood. So if you’re trying to remove a thick coat of paint, apply one generous layer of stripper—don’t keep brushing or you’ll break the skin and allow the product to evaporate.

Then let the stripper work. Be patient. Before it dries, test with a plastic scraper to see if the old paint is ready to come off. If you wait too long and the stripper dries out, just apply another coat.

When you’ve tested a section and the old finish comes off easily, go forward and scrape all of it off. For hard-to-reach grooves and spindles, use a piece of string or a toothpick to work the old finish away. You can go back and reapply stripper to any stubborn patches.

After the entire piece of antique furniture is stripped, clean it with denatured alcohol and let it stand for at least twenty-four hours.

The New Finish

After that, you’re ready to sand the piece, prime it, and apply a new finish or coat of paint. Research historically appropriate finishes or paint colors if you like. Otherwise you may want to match the new finish to another piece of furniture or an existing room in your home.

Remember: just like furniture stripper, varnishes and paints are toxic and should always be used in areas with good ventilation. Read the package carefully for safety warnings, disposal rules and application instructions.

By Erin Sweeney

For Antiques.com

A Chip by Any Other Name – by Rosemary Trietsch

January 6th, 2010 by

chanticleerblue

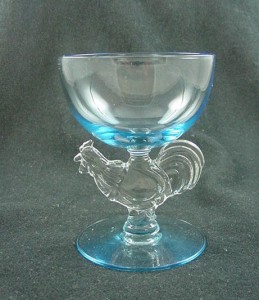
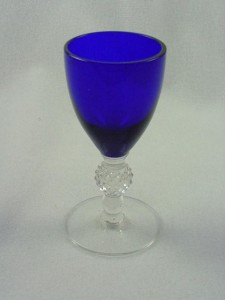
Once a piece of glass is chipped, you can’t make it whole again. After all, whether it’s a ‘flea bite’ or a chunk, there’s glass missing that can’t be replaced. Oh sure, sometimes you can glue the piece back in place, but what about the sliver missing from the rim of your favorite wine goblet? When Crazy glue just isn’t an option, it’s time to look for a glass repair person.

 Now there’s one very important thing to remember: the only way to fix a chip is to remove more glass. Whether you call it restoration, repair, or polishing, it comes down to the same thing. The glass repairman is going to grind down the chipped area and polish it to restore the luster. The amount of glass removed depends on the size and location of the chip, and the skill of your repairman. In some cases, a chip can be polished out so that the repair is virtually invisible. But if the chip is large, you will end up with a goblet that’s shorter than the rest of your set. Then what do you do? Should you throw it out and start hunting for a replacement?

 At this point, you have to ask yourself two things: 1. Why do I want to repair this piece? and, 2. Am I doing more damage to it than if I left it alone?

            Let’s answer question 2 first. If you can have the chip removed so that the repair doesn’t compromise the integrity of the item, then it’s probably a good idea to fix it. If the edges remain intact, the etching or decoration on the glass is untouched, and it looks the way it did before it was chipped, then ‘restoring’ it isn’t a bad thing. Glass golfbluecollectors generally agree that such a repair is acceptable.

            Now on to question 1. If  you’re repairing the item so that you can use it without getting hurt, then repair it and enjoy. There’s a lot to be said for restoring your grandmother’s crystal so that it can once again be used at family gatherings. And given the pioneer spirit of our ancestors, chances are good that grandma would have taken an emery board and smoothed the chip herself. Once again, glass collectors would applaud your decision.

            BUT: if you’re repairing the item so that you can sell it as ‘perfect’ to an unsuspecting buyer, then I know I speak for the entire glass collecting community when I say leave it alone. Glass collectors have enough trouble trying to keep up with all the reproduction junk that’s flooding the market, and we don’t need the added headache of dishonest sellers misrepresenting things just to make a buck. Do us all a favor: leave the chip alone and get a job at McDonalds. They’re giving out really neat Coca Cola Glasses right now  – you can sell them instead.